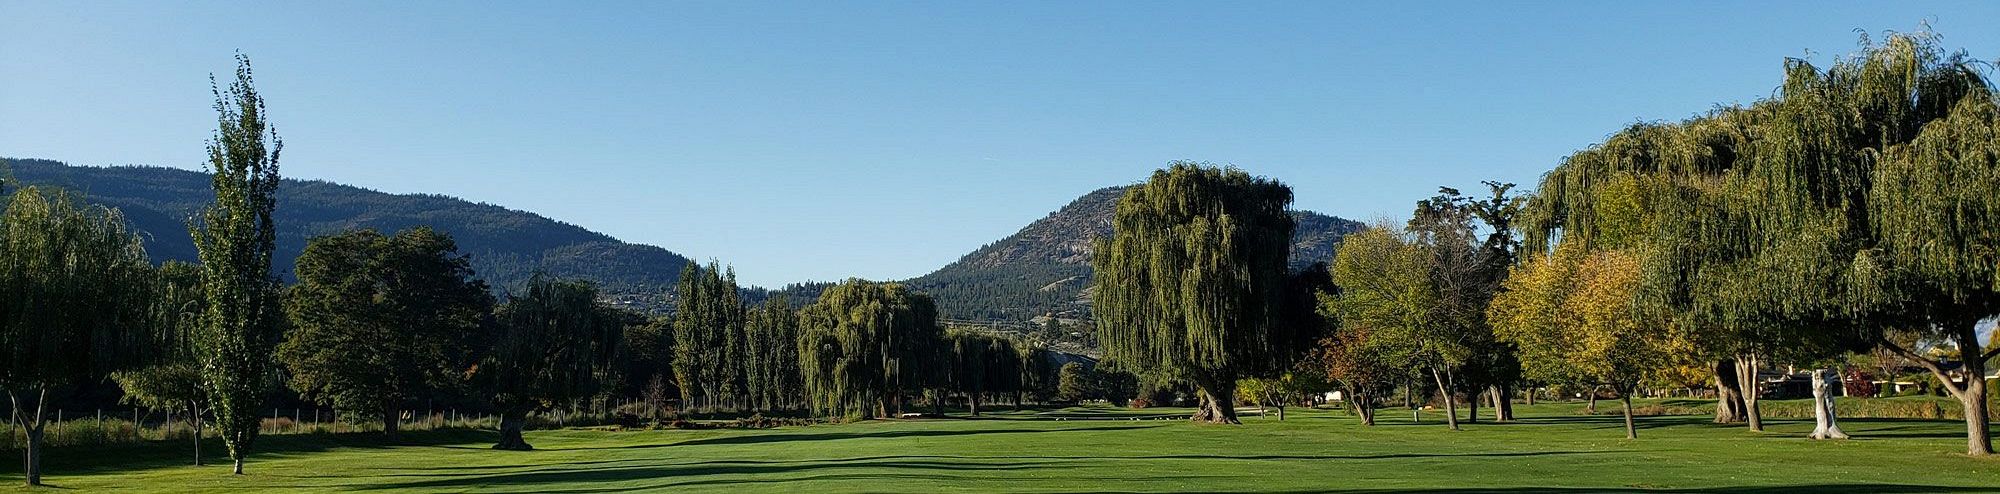
Course Conditions on Apr 02: Beautiful day for golf
Public Tee Time: 250-492-8727 or Email

Front 9
Front 9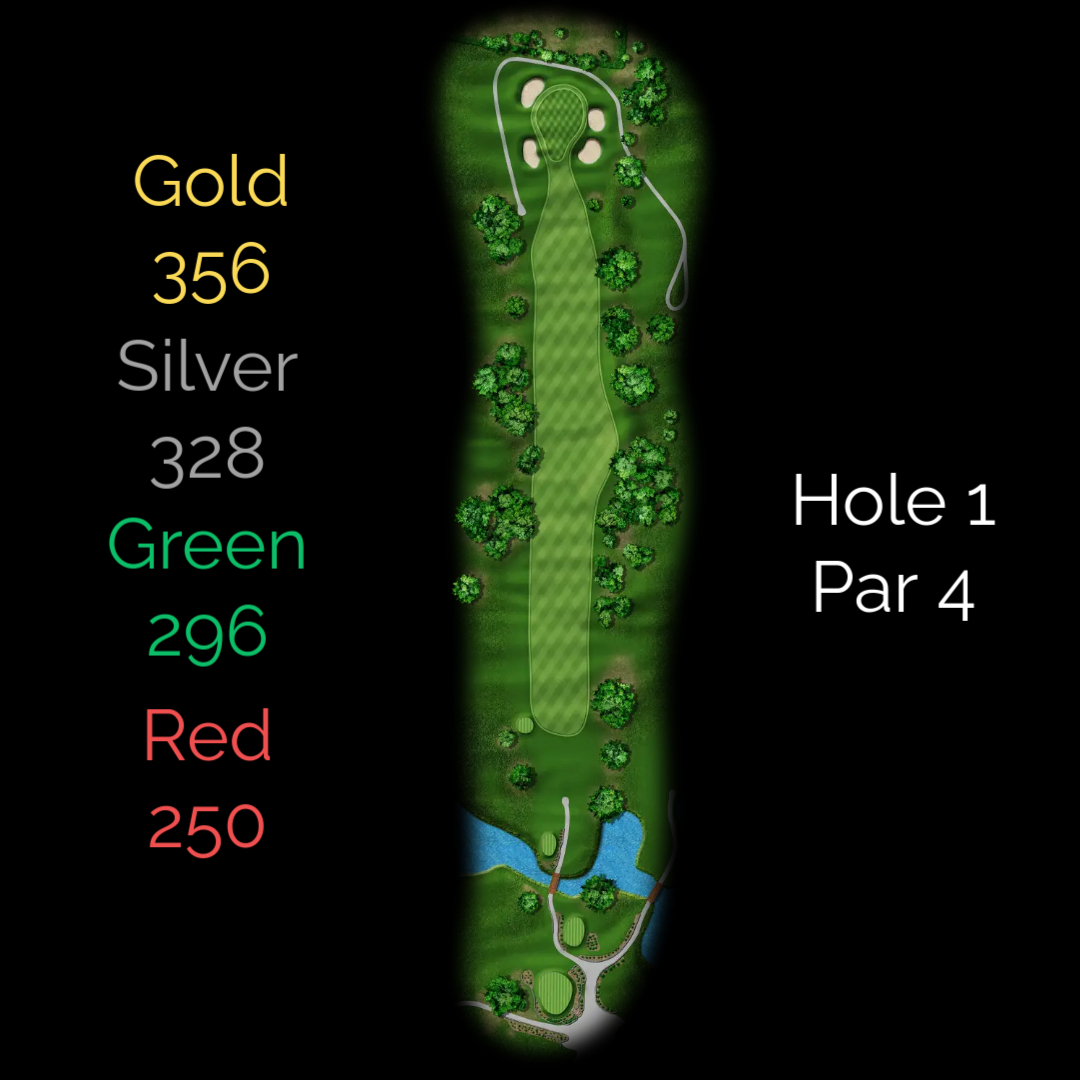
Hole 1
First Flight
The first tee shot of the day is relatively straightforward—focus on getting the ball airborne and into the fairway. However, your approach shot requires precision, as the green is well-protected by bunkers. Aiming for the center of the green is a smart choice, ensuring a safer approach and a good chance at an easy par.
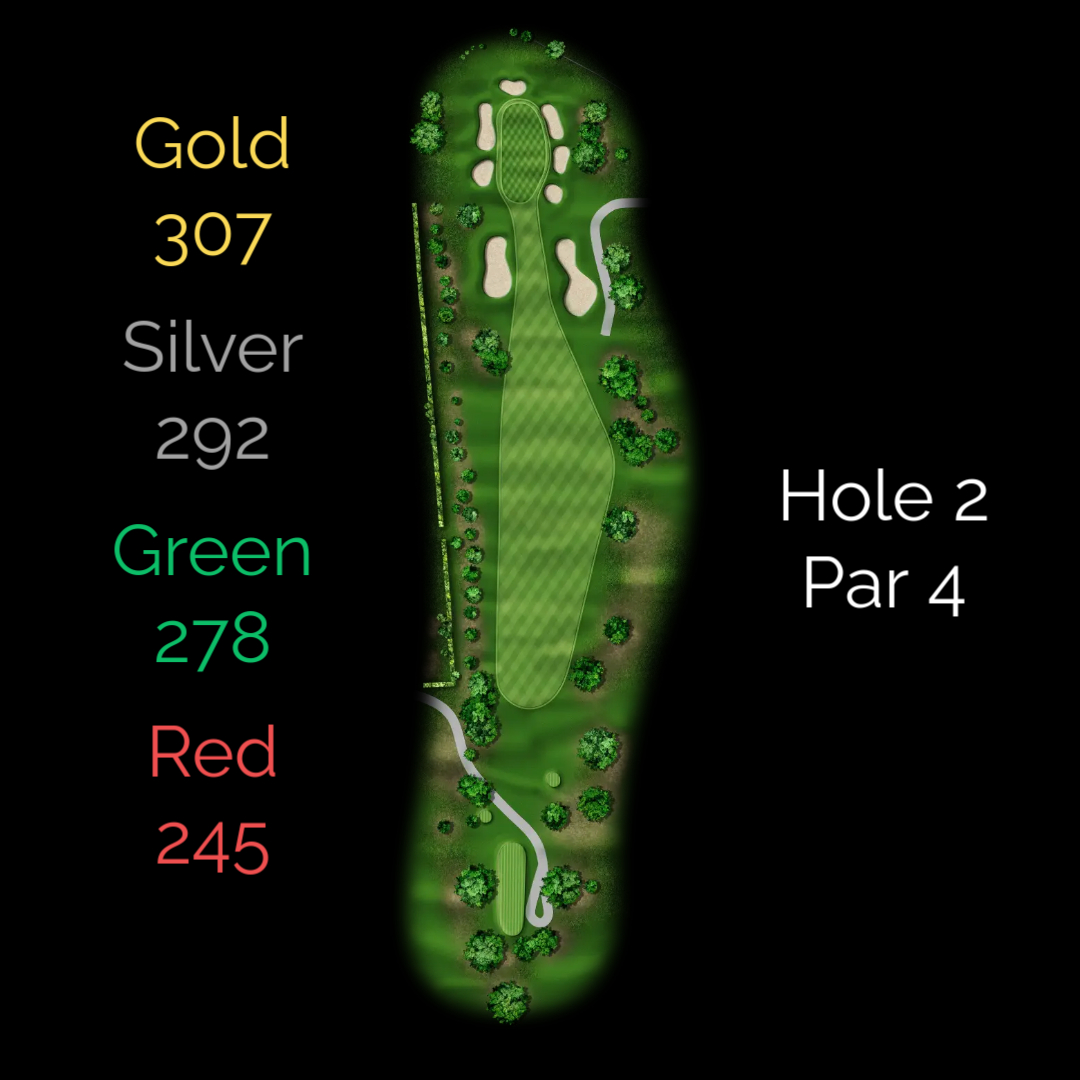
Hole 2
Elm
The smart play on this hole is to use an iron and find the center of the fairway, leaving you with a manageable short iron into the green. However, if you're feeling daring and want to add your name to the Hole-in-One bench, grip it and rip it!
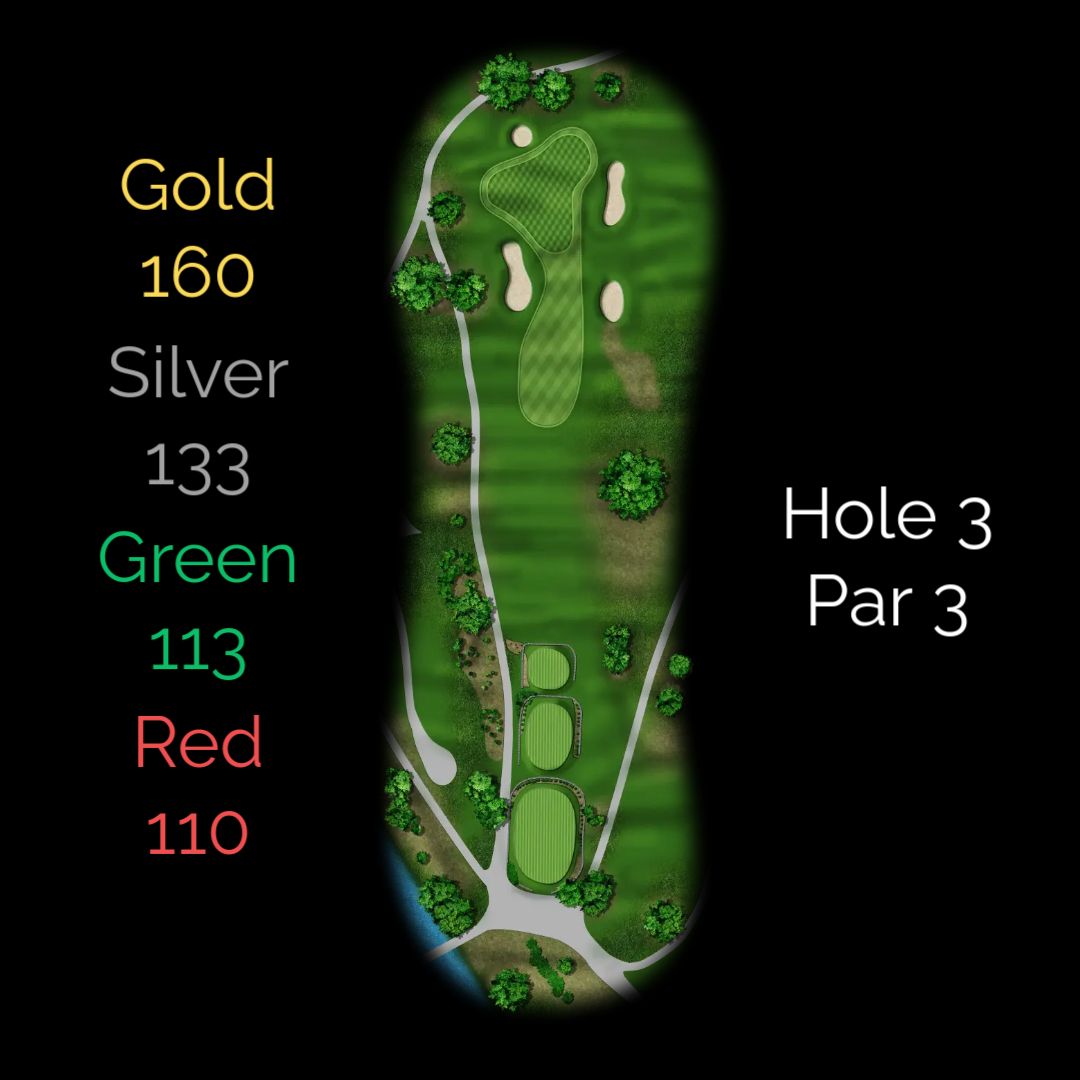
Hole 3
First Chance
The first par 3 on the course presents a unique challenge with its two-tiered, sloping green. Aiming for the center of the green is always a safe bet, but if the flag is positioned at the back, don't hesitate to take an extra club and go for it. Make sure to account for the slope, as it can make putting tricky if you’re not careful.
 - Made with PosterMyWall (32).jpg)
Hole 4
Waterhole
A challenging par 4, this hole demands an accurate and long drive to have a chance at reaching the green in two. If your tee shot isn't ideal, laying up short of the water is a safe play to still set up for a solid par. The large green is well protected by bunkers, so precision on your approach is key. This is also the course’s first of five par 5's for the ladies.
 - Made with PosterMyWall (15).jpg)
Hole 5
The Channel
This challenging par 5 requires precision off the tee, as any shot to the left will find out-of-bounds. Your second shot should be a controlled lay-up to the 150-yard marker. For big hitters or those approaching their third shot into the green, favor the right side - water runs along the left from 150 yards all the way to the green.
Keep an eye out for the painted turtles that call the course home, often spotted along the water by the green. Three accurate shots could give you a look at birdie, but a single misstep and a double bogey might be staring you down.
 - Made with PosterMyWall (7).jpg)
Hole 6
The Hotel
A challenging little par 3 that will have you wishing you practiced your short-irons more often. The two-tiered green is guarded by water on the left and well placed bunkers. For a back flag, aim toward the pot bunker to get close, but be sure to take an extra club, as it's all carry. Precision is key, as a missed tee shot can quickly lead to trouble.
 - Made with PosterMyWall (10).jpg)
Hole 7
Dogleg Left
A left-hander’s dream tee shot, this hole offers a bit of strategy off the tee. The safest play is to go straight ahead, but if you're feeling bold, you can cut the dogleg—just be cautious not to go too far left, as out-of-bounds and houses await. For your second shot, avoid the front-right bunker and focus on placing your ball safely. The green is tiered, with slopes both uphill and downhill, adding complexity to your approach and putt.
 - Made with PosterMyWall (11).jpg)
Hole 8
Waterway
This intimidating tee shot doesn’t require a driver. For the safest play, aim toward the willow on the right side of the fairway, giving yourself the best chance for a solid approach. Water comes into play on every shot, but if you can block it out of your mind, success is within reach. The green is steeply sloped from back to front, so avoid being above the hole—anything past the flag could easily lead to a three-putt.
 - Made with PosterMyWall.jpg)
Hole 9
Halfway Haven
A straightforward tee shot, but accuracy is key—stay out of the trees on the left and avoid the water on the right. The second shot is challenging, with a well-protected green guarded by a pot bunker. Steer clear of trouble, and par is well within reach. Take solace in knowing you’ve completed the front nine—and there’s a hot dog waiting for you at the turn.